
Quick Classroom Getting Started Guide
This guide will walk you through the essential steps to set up your classroom on Elementari, onboard your students, and assign interactive lessons.
Step 1: Create a Class
- Log in to Elementari: Start by logging into your Elementari teacher account.
- Go to the Dashboard: Navigate to your teacher dashboard.
- Create a Class: Click on the
+ CREATE CLASSbutton to open the create class form. - Fill in Class Details: Enter the class name, description, grade, subject, and optionally set a password.
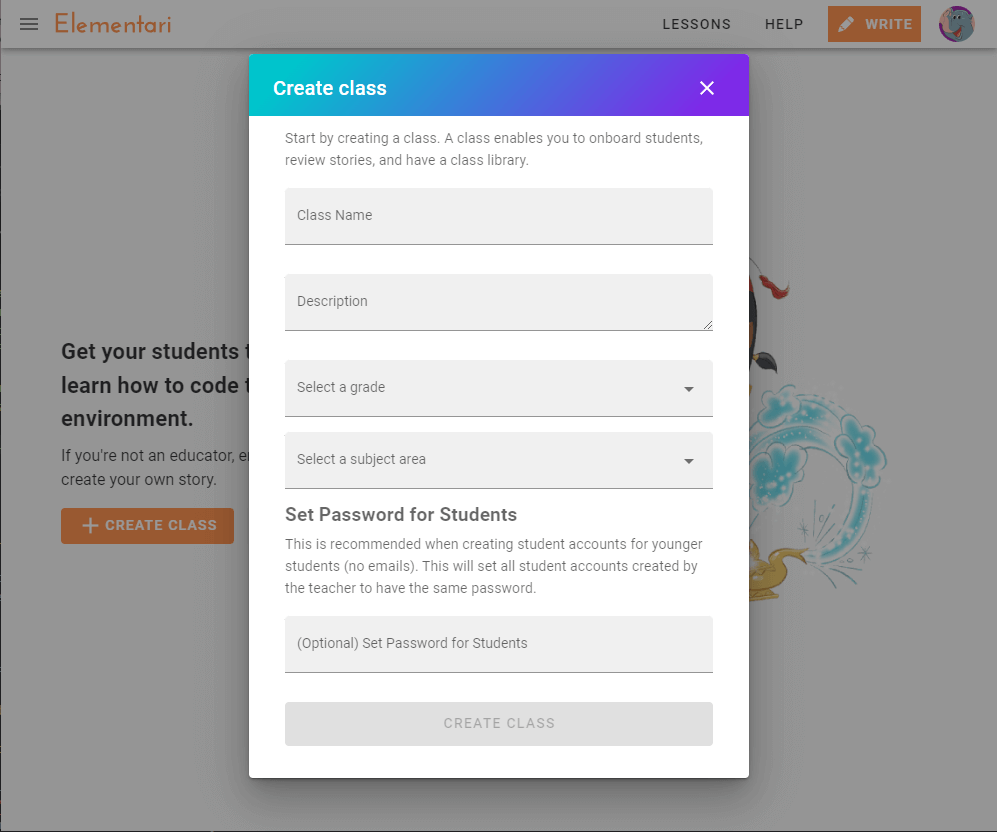
Screenshot of the create class form.
Step 2: Onboard Students
- Invite Students: Provide students with a classroom code or unique invite link. Invite students so they can create their own accounts using Single Sign-On (SSO) with Google, Clever, ClassLink, or email.
- Import Students: Import your students from existing integrations like Google Classroom, Clever, or ClassLink.
- Create Student Accounts: For younger students or those without email accounts, manually create student accounts with usernames and instantly log in with QR Codes or login links.

Screenshot of the invite students dialog.
- Guide: Onboard Students Overview
Step 3: Assign Lessons
- Access the Lesson Library: Navigate to the Lesson Library and select a lesson you want to assign.
- Select the Lesson: On the lesson page, click the
SELECTbutton. - Assign to Class: Choose
FOR YOUR CLASSin the dialog that appears. Fill out the assignment form by selecting the classroom, setting collaboration options, and defining start and end dates.
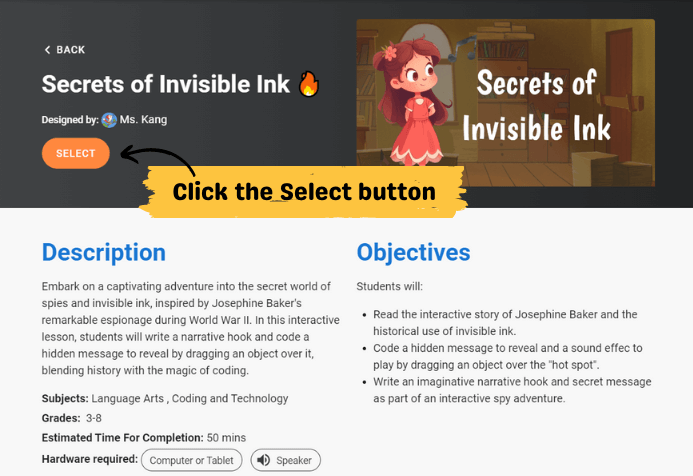
Screenshot of the lesson page with the select button highlighted.
Full Feature Guide
For a more detailed guide on getting started with Elementari, visit our Getting Started page on the main website.