Creating Student Accounts with Username
Overview
If your students don’t have email accounts, you can manually create student accounts using a username. This method is perfect for younger students who can log in using a QR code, a unique login link, or a username and password.
Teacher Instructions
Step 1: Select or Create Your Classroom
- Log in to Elementari: Start by logging into your Elementari teacher account.
- Select or Create a Classroom:
- If you already have a classroom set up, select the classroom you want to import students into.
- If you need to create a new classroom, follow the instructions in the Create a Classroom help article.
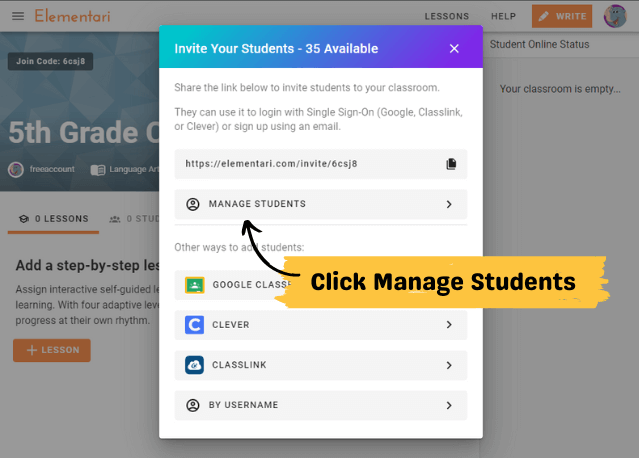
Step 2: Open the Manage Students Dialog
- No Students Yet: If you have no students, a dialog will automatically appear asking you to import your students.
- Existing Students: If you already have students, open the dialog by clicking on the
+Students button.- In the dialog, click the
Manage Students button.
- In the dialog, click the

Click on the Manage Students button to create and manage student accounts.
Step 3: Create Student Accounts
- Fill in the Form:
- Enter the required username. First name and email are optional.
- If an email is provided, the student will receive an automatic email invite to join with their username and password.
- Create the Account:
- Click the
+Create button to add the student. - Each student needs their own login to ensure they can only edit their own projects and you can identify their work.
- Click the
Step 4: Distribute the Logins
- Choose Login Method:
- Students can log in using a QR badge, a unique login link, or their username and password.
- If using a username and password, the default password is the class code. Students will be prompted to create a new password on their first login. You can reset passwords at any time.
Need help finding student login links? See the QR Code / Login Link help article.
For further assistance, please contact Elementari Support.