
Providing Feedback to Students
Providing feedback on student projects is a key part of the learning process in Elementari. Note that only premium members can provide feedback on projects. See Plans.
Step 1: Accessing Student Projects
- Log in to Elementari: Start by logging into your Elementari teacher account.
- Enter the Classroom: Navigate to the classroom where the lesson is assigned.
- Select the Lesson: Click on the specific lesson to view all student projects associated with it.
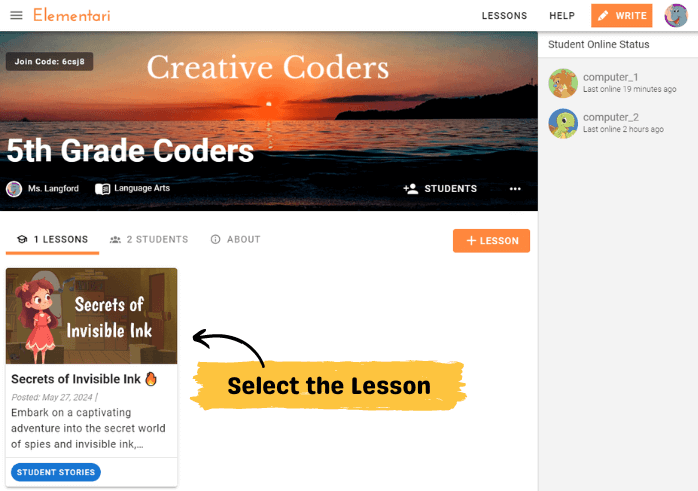
Screenshot of the classroom dashboard with lesson selected.
- Select the Student Project: Click on the specific project you want to review.
- Feedback Status: Indicates the status of feedback with color-coded labels:
- Green: Every feedback has been validated.
- Red: Corrections to validate.
- Yellow: Waiting for student corrections.
- Black: No feedback given yet.
- Feedback Status: Indicates the status of feedback with color-coded labels:
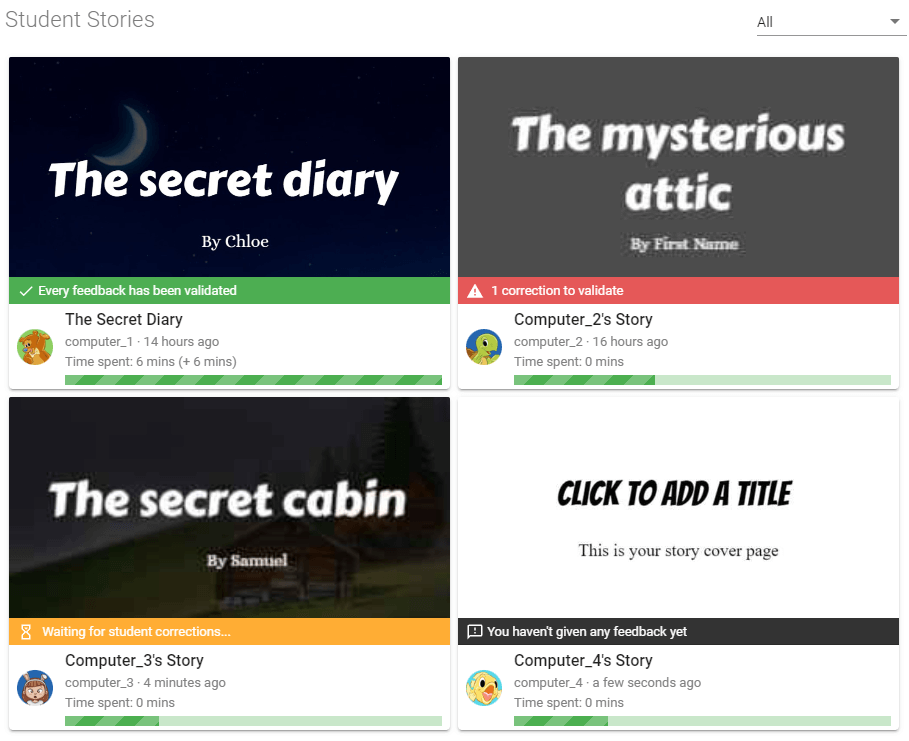
Screenshot of the list of projects with the feedback status.
Step 2: Enter the Student Project and Add Feedback
- Open the Student Project: Navigate to the specific project you want to review.
- Open the Add Feedback Form: Click on the
ADD FEEDBACKbutton to open up the form.
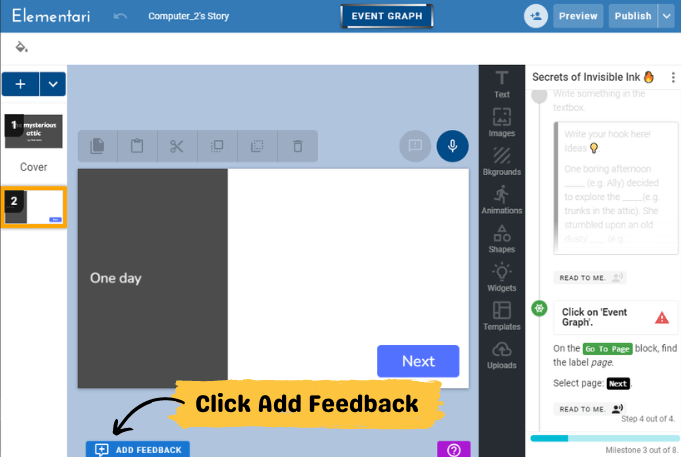
Screenshot of where to click to open up the add feedback form.
Step 3: Provide Detailed Page-Level Feedback
- Page-Level Feedback: Leave detailed feedback on individual pages within the project.
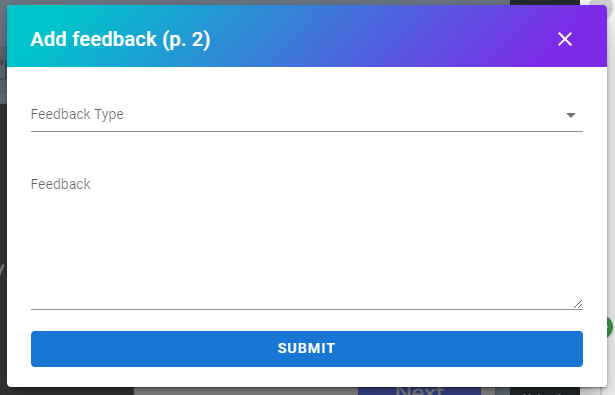
Screenshot of the add feedback form.
Step 4: Student View and Feedback Resolution
- Student Updates: Students will see your feedback in their project view.
- Resolve Feedback: Students will click the
RESOLVEbutton once they have made corrections.
When a student resolves the feedback, you will receive an email notification unless you have disabled notifications.
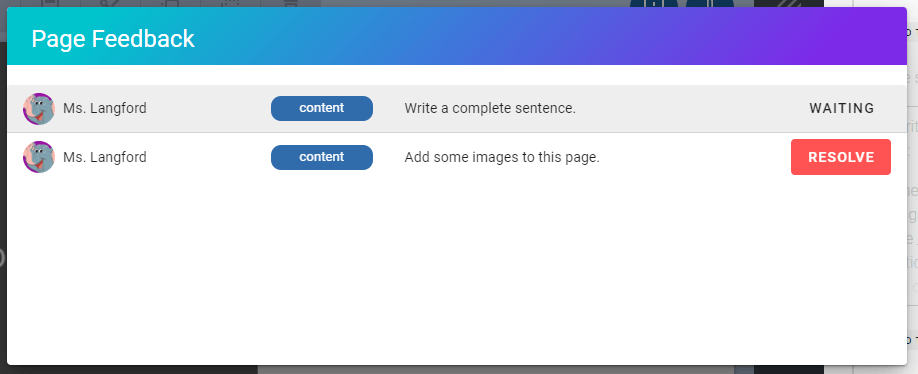
Screenshot of the student view of feedbacks.
Step 5: Validate or Update Feedback
- Validation: Validate the resolved feedback to mark it as completed.
- Update Feedback: If the feedback isn't satisfactory, update it and send it back for further corrections.
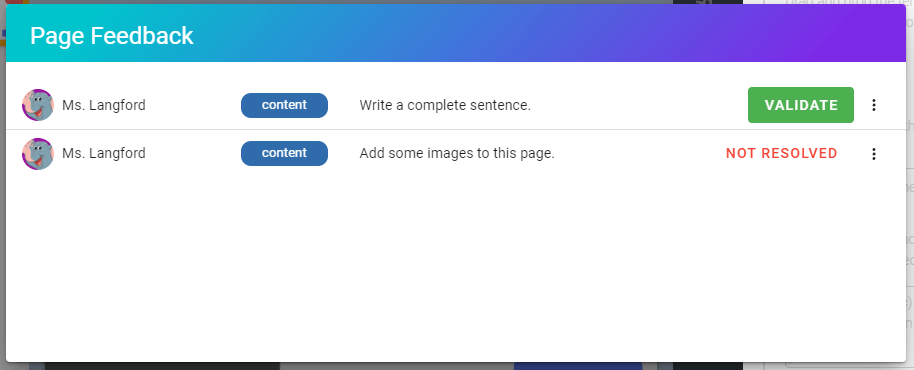
Screenshot of the teacher view of feedbacks on a student project.